Sunday, October 31, 2010

Cooking and Eating Lard and Tallow

Unfortunately, there is scant documentation available to compare the fats of grass-fed beef and pastured pork, so much of this post compares ordinary beef and pork fats.

Tallow is the fat from the the loin and around the kidneys of beef cattle, and is usually called suet before it is rendered. It has a waxy feel, rather than greasy, even before rendering. It is different than the fat in other parts of the beef, and as such has some specific properties.(Tallow can also be rendered from sheep and bison, but I have zero experience.)

Lard is rendered from the fat of hogs. The fat closest to the skin is a harder fat, better used for making sausage than rendering, although it does render. The layer of fat closest to the meat is ideal for rendering, as is the leaf fat around the kidneys.

From Nutrition Data, here are some stats on tallow vs lard (I assume both to be what is found in grocery stores, and not grass-fed), 100 grams of each:

Essential Fatty Acids:
Tallow contains 3100mg of Omega-6 and 600mg of Omega-3, for a ratio of 5:1. (The lower the ratio, the better for our bodies, and ideally 1:1 is best, although all researchers do not all agree.) 
Lard (from hogs) contains 10,199mg Omega-6 and 1000mg Omega-3, for a ratio of 10:1.
(Click here for more on Omega-6 - Omega-3 and health)

Vitamin E per 100g:
Tallow = 2.7mg (14% DV)
Lard = 0.6mg (3% DV)

PUFAs per 100g (PUFAs oxidize and form unhealthy free radicals)
Tallow, 4g
Lard, 11.2g


EatWild, on their Health Benefits page, says grass-fed meats contain 2-4 times the Omega-3 of grain-fed meats. Omega-3 is formed in the chloroplasts of green leaves and algae, so it understandable that Omega-3 would be high in grass-fed meats. Since humans generally don't eat grass, we get our Omega-3 from grass-fed meats, seafoods, and a few seeds and nuts like flaxseed and walnuts. It is estimated that only 40% of Americans eat an adequate amount of Omega-3 essential fatty acids. (Essential because the body needs them and cannot make them from something else.)


Omega-6 is like a fat producing bomb...” ~ French researcher Gerard Ailhaud
Omega-6 fatty acids are essential for health, but the amount consumed by most Americans increases the risk of obesity, diabetes, inflammatory diseases, and cancer. Omega-6s are most abundant in liquid vegetable oils such as canola, corn, safflower, and cottonseed oils. (However, olive oil is low in omega- 6 fatty acids.)

CLA (Conjugated Linoleic Acid), another fatty acid, is an antioxidant with anti-cancer properties. The richest source known for CLA is grass-fed beef. The tallow from their suet is high also because CLA is stored in fatty cells. In fact, meat and dairy products from grass-fed animals can produce 300-500% more CLA than those of cattle fed grains. (36)

Vitamin K2
"Vitamin K2 has a very interesting role: it puts calcium where it belongs (in the bones and teeth) and keeps it away from the places it doesn’t belong, such as the arteries, where plaques calcify. Vitamin K2 is essential for healthy development and growth. Its effects are subtle: though K2 is necessary for bone density, it also prevents premature calcification of the cartilaginous parts of bones.

Vitamin K2 can be made in the body from vitamin K1, which is found in green vegetables, but ideally your diet will contain ample sources of K2 itself. Get your K2 from the butter, organ meats, and fat of animals raised on grass. A reliable sign of K2 is the rich yellow color of butter from cows on grass; K2’s precursor is related to beta carotene
." (1)

From that quote, I assume tallow made from grass-eating beef is higher in K2 than lard from pastured hogs who do forage but do not eat just grass. Most pasture-raised hogs are given supplemental feed which often includes whey.

Smoke-points
Why is the smoke-point important? Certainly the harsh smell of smoking fats in our kitchens is not pleasant! The more important thing, though, is that when a fat begins to smoke, it is chemically breaking down. It is believed that when a fat breaks down (goes past the smoke-point), a large number of free radicals (which are damaging to the human body) are formed.

Lard 370ºF
Tallow 420ºF 

Just FYI (and because the information was handy), a few other smoke points:
Butter 300ºF
Extra-Virgin olive oil 320ºF
Coconut Oil 350ºF
Ghee 375ºF
Chicken, Duck or Goose fat 375ºF

Lard and tallow for deep-frying can be re-used. If you cook something in tallow and want to be sure it keeps no tastes or odors before re-using, you can simply drop some potato slices in the hot fat for several minutes and the potato will absorb any residuals. I use a fine-mesh strainer to strain tallow, and store it separately from 'new' tallow for re-use. Home-rendered lard and tallow are both stable when stored at cool temperatures, although my tallow seems to keeps longer than the lard.

Having said all that, nothing beats lard (which is softer) for a good pie crust... and nothing beats tallow for french fries!

Friday, October 29, 2010

Cold Smoking Pastrami and Chilpotles

This is part 2, continued from here.

I turned the tongue in the curing brine every day for 10 days, then took it out and rinsed it well in cold running water.


Next, to cook it: 
First I lightly sauteed some onions, celery, carrots and garlic in a little olive oil.


Put the tongue, veggies and about a dozen peppercorns in a pot, cover with water, and bring to a boil. Put a lid on the pot and lower temperature to a slow boil for 2-4 hours, depending on size of the tongue. It is 'done' when a knife pierces it easily without resisting. Remove the meat, rinse and allow to cool enough to handle. Discard the remains in the pot.


Remove the skin from the tongue. I found the skin fairly easy to remove in thin slices. Somehow I had thought it would peel off like a hide, but mine didn't.

The instructions for cold smoking the corned tongue to make pastrami call for letting the tongue air-dry for an hour, which I did, then put it in a plastic bag in the refrigerator. It's a little too windy to try and cold-smoke it today, and the tongue may need to dry again after being bagged.


Next, prepare the Pastrami Rub. There are all sorts of recipes, and I chose a simple one for my first try. Other recipes included a variety including salt, mustard seeds, brown sugar, honey and minced garlic.

Pastrami Rub
2 tablespoons black peppercorns
2 tablespoons coriander seeds
2 tablespoons juniper berries
Medium-grind the spices together, and keep in an airtight jar in the refrigerator if not using immediately.

By the way, that manual grinder shown above works somewhat okay for smaller spices like peppercorns but won't 'bite' into larger ones like the juniper berries. The grinding mechanism with somewhat rounded teeth is plastic and I don't think it will last long anyway. I ended up using my electric spice grinder, which is a Braun coffee grinder I use only for spices. To clean it of strong spice residues and oils, I grind some dry beans, or rice kernels.

I'm thinking that since the corned tongue is dry, maybe a light oil or even honey coating will help the rub adhere better. I may even add some minced garlic as I love garlic!

Next is to assemble the cardboard smoker. 


I used a cardboard box with 2 pieces of rebar stuck through the sides to hold the grille, which is a cake rack where the legs had broken away. I would have used a cardboard box qith a lid but my grille wouldn't fit the box I had. This box will get covered with heavy-duty aluminum foil as a lid; the holes in the box ends were taped over with aluminum tape used for HVAC duct work. I used the same tape to tape the flex pipe to the fittings.


The tubing to bring the smoke from the fire is a piece of flexible aluminum duct made to vent household clothes dryers. I just cut a hole in the side of the box and stuffed it in an inch or two.


The firebox is a new portable grill I bought at Lowe's for $6.95 at the end-of-season sale. 


The galvanized vent fittings (used to vent gas water heaters) sitting on the stove will connect to the dryer vent hose and fit almost perfectly over the adjustable top vent in the stove.


This was my first 'trial' set-up, but I decided the cardboard box should sit higher so the tube for the smoke is at more of an angle so the smoke rises through it better.


This looks better to me, but it isn't connected to the firebox since I have a fire already started.


Fire started, applewood chips to flavor the smoke sitting ready. (The chips soaked overnight.)


I poked a meat thermometer through the smoker box. It won't measure the low temps for cold smoking, but at least I'll know if it's too warm!


I'm starting by smoking the jalapeño peppers since they can take a higher temperature to dehydrate as well as smoke them. In the future, I'll need sides on my rack to keep small things like peppers from rolling off and under the rack. I will also need a deeper box if I want to smoke sliced bacon draped over a rod above the rack.


The coals were still pretty hot when I added some applewood chips. My insta-read thermometer said 150ºF, just 5º higher than what I want for the peppers. However, it dropped a little when I closed the vent on top of the grill about halfway. Seems to be plenty of smoke...


Seen from farther away...


Another problem to solve is keeping the smoke tubing centered over the vent in the grill. I don't want to actually attach it since I will need to add more charcoal and more wet chips for a longer smoke time. For now, the garden rake holds it against the wind!


Fixed the smoke tubing support with a couple of bricks. I've had to add a handful of wet wood chips about every half hour to keep the smoke generating. I wonder if wood pieces (sticks an inch or two in diameter) or chunks might be better? I've also tinkered with the air intake (vent opening below the coals) and exhaust (top of the firebox) to keep a good slow fire and smoke going. That will be a learning curve, I'm sure.


Although it is smoking rather well, it is much too hot for 'cold smoking' where the temps need to be 60ºF-90ºF for several hours. Glad I didn't start with the corned tongue!


Next Day Update: I need to fiddle with this contraption more to get cooler temps in the smoke box... so for now, the corned tongue is in the freezer. The peppers didn't dry much in 2-3 hours, probably because I left them whole. This morning I cut the tops off and split them open, and started smoking them again when the coals had died down enough. It's windy and I've had to add another layer of bricks to keep my chimney in place.


Watch for a Part 3 when I (finally) smoke the tongue for pastrami.


Update: I just got a real cold smoke generator and in February 2011, I will be smoking the above tongue for pastrami, and some bacon I have curing. Look for it!


Wednesday, October 27, 2010

Rendering Beef Suet (Leaf Fat) for Tallow, Again


I finally got more beef suet, aka leaf fat, from my meat man, and as promised, here are photos of rendering it for tallow. I  posted on this before, but not with photos as I went along, and photos have been requested since then.

First, the difference in beef suet/leaf fat and regular beef fat. The beef leaf fat or suet from around the kidneys is considered the best fat for rendering into tallow. It tends to be cleaner, with fewer impurities, and more pure fat rather than layers of fat mixed with meat, blood vessels, etc. Certainly, any beef fat can be rendered, as can the fat from ducks, chickens, geese, lamb, hogs... it depends on your use of the fat as they all have different properties both for cooking, and even for soap-making. I just decided to render the beef leaf fat for this post since I got it for free.

Generally speaking, tallow is made from beef fat, lard is made from hog fat. The beef suet or leaf fat from around the kidneys has a much different 'feel' than regular fat also. It is crumbly when you cut it, feels waxy rather than greasy, and has a thin membrane around and sometimes through bits of it.


These are the 2 pieces I got, still frozen and just beginning to thaw on the counter. The one sorta balled up was put back in the freezer for now, since I don't have a pot large enough to do both at once.


To render it, it needs to be in small pieces; the smaller they are, the quicker it renders. I trim out any bits of meat I see in it, although this had almost none... some of the bits of fat will cook out as edible beef cracklins'... just sprinkle a little salt or other seasonings on them while they are still warm.


You can see the membrane in the first photo with the chunks up above, but here's a close-up.


Place all the chunks in a large pot or dutch oven and place in the oven set to 300ºF. How long it takes to render is a combination of temperature and size of the pieces. Note: I started rendering at lower temperatures (around 225ºF) last year; it takes much longer.


This is after about 3-4 hours at 300ºF. I turned up the temperature to 325ºF after this photo, partly because I was impatient, and because I'm not sure my thermostat is correct. It's an older stove that was here when we bought the place.


After most of the fat rendered out and cooled just a bit, I strained it into another stainless steel pot, through several layers of cheesecloth lining a metal mesh strainer. Do not use plastic with the very hot fat; it will melt and you will have an enormous mess to clean up!! (The photo of straining was too blurry to post.) 

In the disposable pie pan in the back, you can see the pieces that did not completely render. I don't know why, maybe the chunks should have been smaller? Or my thermostat is really out of whack? I don't remember that ever happening with previous batches, but for sure the next batch will be cut smaller. I may even run it through the food processor quickly.

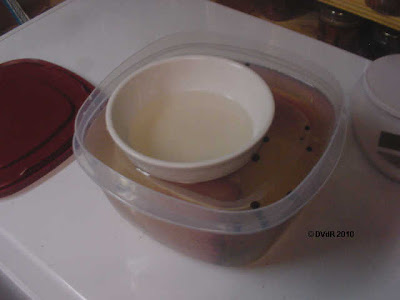
After the fat cooled to about body temperature, I poured the tallow into yogurt containers and refrigerated it to chill completely. As it cools, the tallow will turn white or off-white, and become fairly hard. (See photo at top of post.) I have seen the suggestion of sprinkling half a teaspoon of baking soda over the chunks before cooking to insure a more even color in the tallow, but mine has always been just fine so I've never tried it. Once cooled, the tallow does not need refrigeration, but it should be stored tightly covered in a cool, dry place.

I read somewhere that grass-fed beef tallow, which is naturally low in Omega-6, was the most frequently used household fat in the early 1900's (long before the earliest documented cases of heart disease).  So much for saturated fat clogging our arteries! I'll write another post soon on more of the nutritional differences in lard and tallow and maybe other fats and oils as well.

Rendering tallow or lard may also be done on the stovetop, in some water. However, that requires constant watching, which I don't care to do... and sometimes it's hard to get all the water separated out later. Nothing worse than water in the fat when you add it to a hot pan.

Tuesday, October 26, 2010

Join Me in the Uncheese Party

The FDA is trying very hard to kill our nation’s local Real Food supply. This is the time for us, the people who grow and/or consume wholesome real foods to stand up and say ‘Enough!!".

If you have been reading this blog for a while, you know I promote and back Real Food 100%. I eat as much Real Food as the Government allows in my state, which isn't as much as I'd prefer to eat. I would prefer to buy and use nutritionally superior raw milk, and raw milk products, from a dairy (hopefully local, with good sanitation) but the government says I have no right to make that choice.

I've been following the increasing number of FDA food raids in the recent months, knowing I am helpless to do anything except to rail against the PTB (Powers That Be), and Vote. Now, I can actually DO a small part to help a family the government has chosen to ruin, the family who owns Morningland Dairy.

Morningland Dairy (in Missouri) has been making raw milk cheese for 30 years, with not one person becoming ill from their products. Now the government has mandated the destruction of 50,000 pounds of their cheese without any actual testing of the cheese. If you are not familiar with the situation, read here.

We cannot do anything about that particular batch of cheese, but we can help the family to overcome the financial loss in the hopes that sane minds might somehow prevail, and the family can once again make and sell healthy raw milk cheese. 

The Uncheese Party is running a campaign to raise the amount of money the family is losing, to help them from also losing the dairy. A contribution of $5 will 'buy' one pound of 'uncheese'... not actual cheese of course, but compensation for one pound of cheese. As broke as I always am at the end of the month, I still managed just now to 'purchase' some Uncheese. Won't you do the same?

Click here to lend your support to: Uncheese Party and make a donation at www.pledgie.com !

Monday, October 25, 2010

Venison Braise


It's bow hunting season, and a neighbor gave me 2 deer in 3 days recently... well, most of 2 deer anyway. Just half the backstraps, tenderloins and hams, but all of the rest I wanted. A lot of it is in the freezer now, awaiting fine-tuning into smaller cuts and/or to grind for sausage, but it wouldn't all fit in the freezer.

Usually I can deer meat and it comes out fork-tender, but I just got a new book on braising meats and I decided to try a braise with some tougher parts. I used one neck, 4 shanks and some odd bits that I think were cut from shanks also.

I used a long, slow braise... 20 hours at 200-210ºF, and the results are incredible!

First I removed as much of the silverskin and fat as I could, and browned the pieces in a little olive oil. That was hard to do because each piece was longer than my largest skillet, but at least the meatier ends got browned. Unfortunately I was too busy to take pictures during that process. Sorry. 

Meanwhile, I poured some boiling water over about 2 ounces of dried porcini mushrooms and set them aside to rehydrate.

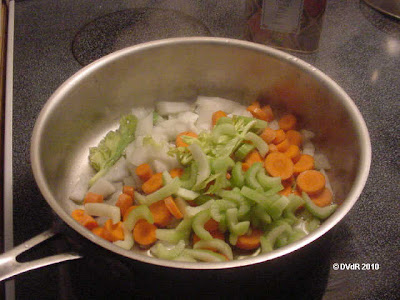
After browning the meat, I removed it to a platter and lightly sautéed the vegetables in the same pan: celery, carrots, onion and garlic but needed a little more olive oil. I used about 4 times the amount of vegetables shown in the photo below... that photo is from another dish, same day.


In a big pot, I heated 2 quarts homemade chicken stock and 2 cups dry red wine. Drained the porcini through some cheesecloth (saving the liquid) and roughly chopped the mushrooms. To the stock/wine mixture, I added the meat, vegetables, mushrooms and filtered liquid, a dozen or so black peppercorns and a few sprigs fresh thyme from the garden. (I didn't add any salt although there is some in the chicken stock. I prefer to add salt while making a dish since I don't always know ahead how I'll use such a large quantity as this.)

I didn't have quite enough liquid to cover the meat so I heated another quart of stock to add. Covered my pot tightly with foil and placed it in the preheated 200º oven. (The pot has a lid but it wouldn't fit in the oven with the lid on!)

Finally, I went to bed... with delicious aromas wafting through the house... it cooked almost all the next day before I took the pot out of the oven and peeked. Man, what a delicious smell. Sometime before I fell asleep, I remembered my oven runs low by about 10º, so I increased the setting to 210º.


Now I have 3½ quarts of deeply colored, calcium-rich gelatinous stock, and several pounds of tasty, tender meat (there was more meat still in the pot when I took the photo above). I'll freeze the meat in meal-size portions with some of the stock, and freeze (or maybe pressure-can) the rest of the stock. 

I'll use some of the meat for a venison and sprouted-barley stew, made with both hulled and pearled barley. I'll thicken some of the stock for a venison meat sauce to serve over wide noodles, some for "pulled venison" in a BBQ sauce, and I'll use some for a mountain version of paella (sans seafood). I've had a Cuban dish called 'Ropa Vieja' which translates as 'Old Clothes' and would be good with this shredded venison and some yellow rice. 

YUM. YUM. YUM.

Would I do it again? You betcha... but probably not with so much meat at once, and the shank bones/neck cut in half to brown and handle easier.


Edited to add: After eating my fill, I put up 6 containers (16 oz.) of meat with a little broth, and 6 containers of just stock, for the freezer. The braise was so tasty that I used almost the same braise, just different spices) for 2 racks of venison ribs, but only had them in the braise for about 2 hours, enough that they were very tender. Then brushed some BBQ sauce over them and into the 350º oven, cooking just until hot and delicious. (I would have finished them on the grill rather than the oven, except I was out of natural charcoal.)

I'll have more venison preps coming soon, including sausage. Stay tuned!

Saturday, October 23, 2010

Scrambled Eggs

Needs no explanation, but you can read the article here.
 

Thursday, October 21, 2010

Earthing, Health, Weston A. Price and Francis Pottenger

I truly believe what Weston A. Price, DDS and Francis M. Pottenger, Jr., MD 'discovered' about nutrition is of prime importance today, even though I don't think either one had the all the answers for optimal health. What they realized and promoted, first and foremost was the importance to our health of eating real, unprocessed nutritious foods. That remains true especially now, even though it is almost impossible for most people to eat only unprocessed foods in any industrialized country.

Pottenger's cats (more than 900 over 10 years of research) showed optimal health on a balanced, raw diet. Of course that would not work for me since I no longer have any real teeth for tearing and shredding raw meats and vegetables. I have to agree however, that most nutrients are destroyed by heat, and eating raw foods make sense. I eat some raw foods in the form of fruit, juice smoothies and salads, and hope that I still get some nutrients in rare/medium-rare beef and lightly-steamed vegetables. I cook pork and fish until fully done, though.

Most of what I know about Price's dietary ideas comes via Sally Fallon and the Foundation she started. (Plus her books, of course.) I agree with many food preparation methods she recommends, like raw lacto-fermented vegetables, and nuts/grains/beans that have been soaked overnight in aciduated water to remove as much of the phytates as possible. However, even doing that soaking process still leaves me with an unpleasant feeling in my system from eating those foods after cooking. I know it doesn't seem to affect everyone that way... and suffice it to say my doctor still has me off most of those foods for now anyway.

The 'grounding' of humans by Earthing is just as logical to me. I suspect Dr. Price probably never gave thought to connections between the vitality he was discovering and how many of the people he studied were barefoot... or that it might be related to health equally as much as the unadulterated foods they ate. People worldwide went barefoot all the time back then... who would have thought it might have any connection to health?

I can tell you I worked outside barefoot 5+ hours yesterday doing fall clean-up, felt energetic the whole time, and slept soundly. When I think about my deep sleep, though, I must acknowledge I was quite physically tired. (What 70-year-old wouldn't be, working hard after 2 months of being a couch-potato?) Again today I worked outside barefoot for 6-7 hours and although I'm not quite so tired, I also feel more energized. I will continue to be aware and monitor my contact with the earth... although winter is coming with snow and ice, which will put a dent in going barefoot!

One of the reasons I can so readily believe the earth-effect on humans is from reading Phillip S. Callahan and his work on paramagnetism (low-frequency forces in nature) and and the amazing effects it has upon soils, plants and people. The works of Rudolph Steiner (on Biodynamics) are also very impressive although I understand very little of it. (I'm told we don't really have to understand it ... it is based on the interconnectedness of the living network of earth energies and they work, given the right environment, whether we understand them or not.) 

We humans have severed almost all direct connection to the Earth and to our food in the last hundred years. Have you ever tasted the dirt to see if it is sweet enough to grow vegetables? When is the last time you or your children went barefoot, played in the dirt or made mudpies? Natural disease immunity is down because we don't get "dirty" anymore, and instantly reach for an antiseptic body-wash if we do happen to get a smudge. Many of the dedicated gardeners I know never go barefoot; plus they always wear garden gloves (to protect manicured hands?), and sit on a low stool rather than kneel on the dirt to plant bulbs.

We get our weather forecast from the weather channel, and haven't many clues about the current moon phase unless we happen to glimpse a gorgeous full moon, or it's very dark outside at night. When is the last time you gazed up at the stars for more than a minute or three? How many constellations can you identify? Can you tell the time (or the season) just by their positions in the night sky?

Kill and pluck one of those chickens we just bought and keep in the backyard for eggs? You gotta be kidding. Chicken comes from the store, cooked and kept warm in a little domed package!

If something raises the "hackles" on our necks (yes, our fine neck hairs work just like hackles), we are most likely to ignore it (unless we live in an urban, crime-ridden city). Same denial goes for a sixth sense, intuition, ESP, or any other subtle energetic perceptions that might make their way into our conscious minds.

Is it any wonder we assume folks like Steiner and Callahan to be out on left field and steeped in a belief in alchemy?? Yet, their ideas have proven over and over to provide positive results working with Nature. 

Wasn't it Albert Einstein who said, "Insanity is doing the same thing over and over again and expecting different results." ???


Tuesday, October 19, 2010

Earthing: Health Benefits of Going Barefoot

Photo Courtesy Dave Goodman's photostream

Science proves benefit of going barefoot! I know I always feel better when I've been barefoot out in the garden, but I didn't know there is some scientific validity to it.

I love being barefoot outside, working in the garden or the yard. I love the feel of the soil and grass beneath my feet. I love sticking my feet into the tumbling waters of my creek, and when I was a kid I loved splashing in the ocean. I suppose subconsciously I feel 'connected' when I do that, but frankly, I just never gave much conscious thought to it. I suppose you don't either.

Photo Courtesy ecnadniar's photostream

Then I came across "Earthing"... the interaction of the life-energy of the earth and the human system, and it all began to make sense. 

We all know about grounding electrical devices so they don't shock us, and most of us have experienced the shock of walking across a carpet on a low-humidity day and then touching something metal like the doorknob, and getting a shock... or getting zapped in winter just by touching the car door as we exit the car. But even when no sparks are jumping, there is still a high voltage between our bodies and the ground, and our body is surrounded with an invisible electric field.

If you think about it, we are surrounded by electricity in many forms. Electromagnetic fields are all around us... microwaves, radio waves, portable phones, cell phones, computers, fluorescent lights, even the crackling during an electrical storm scatters electricity. We are constantly bombarded by voltage-induced inflammatory stress our grandfathers would never have imagined.
 
Our houses are grounded by a bare copper wire from every electrical outlet that runs back through the electric panel which is connected to a long metal conducting rod driven into the earth to discharge (ground) that build-up of electrical current (free radicals). Technically, that ground rod discharges the positively-charged, electron-seeking free radicals into the earth where they are neutralized by negatively-charged electrons. Free radicals (+) are constantly seeking electrons (-) to which they can attach themselves. Everything strives to be in balance!

When we touch the earth with our bare feet, the same thing happens... we discharge the electrical current that has built up in our bodies. Even though we are not visibly 'plugged-in' to any electrical source, our bodies run largely off of bio-electricity, and we have organs dedicated to sensing electromagnetic impulses, both inside and outside the body. The pineal and pituitary glands are both directly tied to the body's ability to sense and actively experience electromagnetic phenomenon.

Our nervous system is based entirely on the ability to transmit electric pulses. Every cell within the human body pumps ions in and out of the cell for energy purposes (this is called the Sodium-Potassium pump, and can be found in all animal life).

Do you remember how wonderful it feels outside after a big storm has passed by? That's because of all the negative ions in the air (which help discharge our build-up of positively-charged free radical ions). Unfortunately, it doesn't last very long. Sigh.

"Recent scientific innovations have discovered that the [rubber] shoe sole completely blocks all the free electrons that shield and nourish the entire earth. When you step outside barefoot, especially when you step onto stone, you are encompassed at the speed of light with free electrons that the earth just gives you – all day, every day – all night, every night – forever. As soon as we put this (the shoe) on, it’s gone – totally gone. We are insulated. 

Recent scientific advances have discovered the following…that circadian rhythm problems, hormonal disorders, cortisol disorders, heart rate variability problems are all related to wearing shoes. That’s right – meaning the arthritis, the inflammation, the herpes, the hepatitis, the autoimmune conditions are intimately related to wearing shoes. This may be the most destructive device ever created by humankind.”  (source)

There's a great photo by Dr. Stephen Sinatra the 'source' link just above, showing blood cells before and after Earthing. Before, the cells show massive clumping and irregularity... and 40 minutes later they show relatively uniform and symmetrical cell disbursement. I highly recommend reading the whole article, where the health benefits I haven't mentioned here are fully discussed.

There's far more to Earthing than "just" the exchange of ions when we go barefoot. The Earth is a living organism, capable of healing us, and itself. All our 'medicines' come from the Earth in some form... originally from plants (including medicinal herbs) and more currently, from chemicals. But those chemicals didn't come on a shuttle from outer space. Nothing we ever touch came from outside the Earth, except maybe a meteor fragment.

We have isolated ourselves, our foods and our medicines, from the source. Real Food Heals. The Earth Heals. Time to go barefoot again and re-connect with all that healing energy and keep eating Real Food!

Sunday, October 17, 2010

Planting Garlic and Shallots


For sure, my garden needs a transformation from all the neglect! I need to make beds to plant with garlic and shallots, and by the looks of the mess, it will be a sore chore.


First, till and remove all the grass, weeds and their roots... Luckily I was able to hire a helper.


Next, apply some amendments. The blue-green stuff is Greensand, a trace mineral supplement. Minerals help with bulb formation, necessary to grow decent size heads of garlic and shallots.


I ran string lines for rows 36" wide with 12" pathways between them, and then piled all the dirt from the paths onto the rows.


First bed, ready to plant. The rest soon followed and I have 3 lovely rows of fluffy soil which I hope will drain well even if the creek floods (which it does, but usually not up that far).


Next, lay out the garlic clove rows, 6" apart. They will get buried about 4" deep, with the tip planted UP.


After planting, the garlic rows get a covering of around 3 inches of straw. If our Fall is mild, the garlic will put up green shoots in several weeks. That growth spurt helps put down roots, and the green tops will die down for winter. In spring the tops will begin to grow again and the roots will make a new garlic bulb.


On to shallot layout. Planting shallots is a little different than planting garlic. When shallots grow, they form a cluster or clump around the shallot planted, rather than forming cloves the way garlic does. I plant shallots at least 8" apart in rows that are about a foot apart.


The shallots must be planted with the top of the neck just peeking above the soil. This keeps rain (even in the form of snow) from seeping into the shallot and rotting it. In some colder areas, shallots not hardy enough to plant in the fall. It's always "try it and see" for me in my zone; if the winter is exceedingly cold, these may not survive, especially being planted so close to the surface. Shallots generally do not get a mulch cover either, as this can encourage bulb rot. I do mulch if a cold winter has set in, but not until around Christmas. I also remove the mulch at the first signs of warming in the new year.

The garlic and shallots should be watered well after planting, and not watered again until quite dry. Usually I water 2-3 times before Thanksgiving, depending on the weather. Right now it has been very dry so it may take more watering. They need about an inch of water a week.

In the spring before bulb formation begins, I will side-dress the garlic and shallots again with trace minerals and well-composted manure. Voila! Garlic and shallots coming to my table soon!!

Friday, October 15, 2010

Fall To-Do list: Cold-Smoking

Being a gardener, I always have a long fall 'To-Do' list to get the garden ready for winter. However this year there is an additional 'list' of food-type things I've been wanting to try. Now that the weather is cooler, I plan to try some cold-smoked meats and vegetables.... and maybe even some cheese. I'm starting with a beef tongue for pastrami here, and I'll get to other food items in later posts.

Cold-smoking, if you are not familiar with it, is smoking a food (meats usually, or cheese, nuts, jalapeños, etc.) at a very low temperature (around 60ºF) so the item acquires a smoky flavor but does not 'cook'. (It is very different from grilling with smoke, which cooks with a smoky flavor.) The fire box, which gets damp woodchips put on the fire coals to make smoke, is usually several feet away from the container holding the food, and the smoke is piped upward at an angle to it. This allows the smoke to cool in the fall air temperatures around it as it passes through the pipe, and the food gets the smoke without the heat.

After smoking, the food (esp. bacon) may be frozen, refrigerated and/or a portion cooked to eat immediately. However, before smoking, most foods must be 'cured', usually in a brine with a tad of preservative. Common meat preservatives contain small amounts of nitrates (nitrates are regulated by the government)... and that used to worry me. We've all heard to cut-down or totally avoid nitrates/nitrites, but it turns out we get most of them in our vegetables... about 65mg of the average 73mg we ingest daily!

I will do an in-depth post soon about nitrates in vegetables, and ways to cut down on them, but for now since I'm posting about cold-smoking, I'll just say there are ways to eliminate most nitrate hazards, such as taking Vitamin C on a daily basis. 

BTW, bacon sold as "Nitrate or Nitrite-Free" usually has celery juice added as a preservative... check the label. Celery juice often has more nitrates than the amount of nitrates in regulated meat-preservatives!

My hold-up on cold-smoking before now has been money for construction of a smoking chamber, and of course, warm summer temperatures. Recently, though, I found several different ideas for making temporary, inexpensive cold-smokers (one made out of cardboard boxes!) so now I'm ready to attempt the process.

My first food to try is a beef tongue to make pastrami. (Pastrami is just corned beef that has been cold-smoked.) Today the tongue goes into a brine for 10 days in the refrigerator. This brine is Fergus Henderson's ratio of 2 cups sugar to 2-1/4 cups salt dissolved in 2 quarts of water. I added 12 peppercorns, 12 juniper berries and 5 whole dried allspice berries, brought it all to a boil so the liquid gets permeated with the spices, and then cooled it. There are many recipes for spices in corning beef, and over time I'll try many. For my first one, I wanted 'simple'.


The 'cure' (brine) also has 4 teaspoons of DQ Curing Salt, aka Prague Powder #1 or Insta-Cure, per 5 pounds of meat added, which helps prevent botulism. The sodium nitrite concentration in the curing salt is 6.25%, and my beef tongue weighs just 1.91 pounds. I weighed 4 teaspoons of the DQ and it came to 20 grams, or 4 grams per pound. So I added a tad under 8 grams to my brine.

The DQ Curing Salt is pink so it doesn't get confused with regular salt

Tongue Floating in Brine

Tongue submerged with a weight

Ready to refrigerate

Now the tongue in brine gets refrigerated for 10 days, and will get turned every day to assure full penetration of the cure.

Photo Courtesy of wiselywoven's photostream

I also have some jalapeños just now ripening from green to red, and then they will be smoke-dried to become chilpotle peppers. I'll post that when I actually do it...

I DO have a small pork belly to cure and smoke for bacon too, but I'm a little hesitant until I see how the tongue turns out. When the tongue is fully cured and ready to smoke, I'll post pictures of making my temporary smoker... and actual smoking of the tongue for pastrami!

Update 10/19: Part 2 will post on October 29, so watch for it!

Wednesday, October 13, 2010

Fall Clean-Up and Prep


There always seems to be SO much to do in a Fall yard and garden, and mine is no exception. Unfortunately, my summer garden did not get the attention needed, nor did the yard, so both were full of tall weeds and tall grass. I had to tackle some of the tall grass first, so I could even get to the garden. I mowed with the highest blade setting and even then some of it just got knocked down. 

Raking was necessary, and there was LOTS of it to do... but it will make nice mulch for the garden when it's a little more dry. After the cut grass piles get moved, I should be able to do a final mowing for the year. There's still much more tall grass to mow also, sides and back of the house, and I'm a bit ashamed I let it got the better of me. However, what I did manage to rake is in rows, drying, and turned over daily.

Now, it's on to garden #1. It is a mess from neglect, and I need to plant garlic and shallots, so look for a step-by step transformation to be posted in a few days...